Struggling with morning pages again, that's really a common challenge around here. If there is little to no sleep to be had, the morning pages simply don't happen, ever. It's more important that the kids are fed and the husband is off to work.
I recently started reviewing different methods of making Art Journals. Just google it or check Pinterest. There are tons of tutorials, so I won't bog you down with those here. However I will say, morning pages doesn't always need to be specifically hand written pages. Sometimes, the time to do morning pages can be spent in the studio- well, I can dream- or it can be in the afternoon, during kid art time. I can paste some pretty \left over bits to journal and take on a bit of craft, just for art's sake. It is not designed to be sold. There is no end customer in mind., It's just a chance to express myself, differently then the written, set time frame, disciplined way that I tend to think of Morning Pages.
I DO recommend the traditional Artist Way morning pages, if you are able to organize your life and child care to do them. It's really transformative and can inspire massive changes in behavior that gets in the way of creation. Moves barriers in the creative, and it makes a discipline to get actual work done. Just one of the BEST ways you can feed your creative self, morning pages.... 3 pages every day. even if they say the same things, even if they are the worst writing of your life, even if it's awful and embarrassing.... come back to morning pages.
In the mean time- Afternoon Art pages will have to suffice. I'm making books, and I'm recycling old artwork into the books. SO- sometimes the art is made, BEFORE it lands in the book, and Sometimes the Art is made AFTER it lands in the book.
Pages made before they land in the book:
Pages made after:
Here are notes about running my own business, the bumps along the way and the victories that deserve ice cream parties.
Friday, June 3, 2016
Saturday, May 21, 2016
Bubble Painting with Kids
After dinner and before bath time, I struggle to keep my kids busy in a genial manner. (I.e. they are cranky and fighting) SO, I started messy art time. The theory behind it, the toys must be picked up and put away, and the next stop is the tub anyway, why not get really messy?
In New York I saw a LOT of art.... and not all of it was masterpieces. At the Armory show, I saw a painting, where the artist had a Neon Green canvas, and they blew bubbles at it, and they left these delicate "jellyfish" impressions behind. My next thought- "My kids could do this"
So, I made bubble potion (it needs to "set") loaded the kids up, bought some tempora paint and more emergency bubble potion, and wands.
We used 18x24 canvas board, but I'm sure watercolor paper will work just as well.
I set up the kid easel in the yard, but it didn't get used. they sat in the grass and blew bubbles, ALL kinds of bubbles, sort of at the canvas, and a lot at each other. Laughter was had by all.
Here are some of our results~
The Great news- the kids had fun.
Word to the WISE- The Tempora paint we got did not actually wash out of their clothes, or off my sidewalk, even though it was advertised as "washable".
I think the kids got lots of special effects. I went in with a bottle of gesso, and used the lids from the gesso to add a few white circle "bubble shapes" to round out the composition a little bit.
In New York I saw a LOT of art.... and not all of it was masterpieces. At the Armory show, I saw a painting, where the artist had a Neon Green canvas, and they blew bubbles at it, and they left these delicate "jellyfish" impressions behind. My next thought- "My kids could do this"
So, I made bubble potion (it needs to "set") loaded the kids up, bought some tempora paint and more emergency bubble potion, and wands.
We used 18x24 canvas board, but I'm sure watercolor paper will work just as well.
I set up the kid easel in the yard, but it didn't get used. they sat in the grass and blew bubbles, ALL kinds of bubbles, sort of at the canvas, and a lot at each other. Laughter was had by all.
Here are some of our results~
The Great news- the kids had fun.
Word to the WISE- The Tempora paint we got did not actually wash out of their clothes, or off my sidewalk, even though it was advertised as "washable".
I think the kids got lots of special effects. I went in with a bottle of gesso, and used the lids from the gesso to add a few white circle "bubble shapes" to round out the composition a little bit.
Labels:
art,
bright colors,
bubbles,
color,
DIY,
kid art,
process,
summer,
summer fun,
watercolors
Tuesday, January 19, 2016
Critism it's going to Happen- Response is ok
Anytime that you put yourself out into the world, and try to sell off your wares.... you are open to criticism. That is the scary part. "what if people don't like my stuff? Then they must not like me."
Well, we live in a very critical society. It's definitely going to happen. In art school- you go through these things called "art crits", where the other students give their honest opinion of the work that you just spent 6 weeks making. These are small versions of the "real world" experiences with criticism that come out of the woodwork when you put your name out there. "My 12 year old/sister/ friend can make this for me, where did you get the materials?" Is a very common comment I receive when I do a public craft fair.
Take time to respond in a way that meaningful to you- well, what on earth does that mean? You can get defensive and reactionary, but it won't teach you anything new. And, usually, this sarcastic quickie comeback, doesn't make any friends. For growth, and bettering your art honing your skills, sometimes, listening to what a client has to say can start a dialog.
So, before you go to your next craft fair, prepare yourself. It's not you- it's them. We are so blessed to receive cheap goods and services. There is no comparing a handmade object to a mass produced item. It is up to you to educate your buyers on what they are actually paying for. How long have you practiced your skills? How long did that thing take you to make it, how do you carefully choose and source your materials, all of these things start a narrative. That's right, they tell your story!
Have your elevator pitch prepared. As soon as you are putting your work out for sale- that might be online, or in a brick in mortar store. Once you have made your product available, be prepared with a positive explanation for what your thing is. Sometimes go into detail on how you made it {barring a few trade secrets, of course ;)}
Creating value, that takes a trick!
Remember, as you are a consumer and evaluating others work... You can choose to treat other artists the way that you would like to be treated. There is power there, and there are choices. You can choose to be an encourager! So Do It!
I feel that there is enough room for everyone in the market. There is room in the market, for as many jewelry artists as there are people that wear jewelry. I'm sure there is room to reach out to those who are new to their craft. If there is a thing that you can offer, do it!
Well, we live in a very critical society. It's definitely going to happen. In art school- you go through these things called "art crits", where the other students give their honest opinion of the work that you just spent 6 weeks making. These are small versions of the "real world" experiences with criticism that come out of the woodwork when you put your name out there. "My 12 year old/sister/ friend can make this for me, where did you get the materials?" Is a very common comment I receive when I do a public craft fair.
Take time to respond in a way that meaningful to you- well, what on earth does that mean? You can get defensive and reactionary, but it won't teach you anything new. And, usually, this sarcastic quickie comeback, doesn't make any friends. For growth, and bettering your art honing your skills, sometimes, listening to what a client has to say can start a dialog.
So, before you go to your next craft fair, prepare yourself. It's not you- it's them. We are so blessed to receive cheap goods and services. There is no comparing a handmade object to a mass produced item. It is up to you to educate your buyers on what they are actually paying for. How long have you practiced your skills? How long did that thing take you to make it, how do you carefully choose and source your materials, all of these things start a narrative. That's right, they tell your story!
Have your elevator pitch prepared. As soon as you are putting your work out for sale- that might be online, or in a brick in mortar store. Once you have made your product available, be prepared with a positive explanation for what your thing is. Sometimes go into detail on how you made it {barring a few trade secrets, of course ;)}
Creating value, that takes a trick!
Remember, as you are a consumer and evaluating others work... You can choose to treat other artists the way that you would like to be treated. There is power there, and there are choices. You can choose to be an encourager! So Do It!
I feel that there is enough room for everyone in the market. There is room in the market, for as many jewelry artists as there are people that wear jewelry. I'm sure there is room to reach out to those who are new to their craft. If there is a thing that you can offer, do it!
Tuesday, January 12, 2016
Dip Dyed Tote Bags
I love giving handmade gifts. Every year at Christmas, I try to make a big batch of, well, thingys. and give them away . This Year it was Chex mix for the boys and tote bags for the girls. Everyone seemed happy!
This project is probably 10 and up. I kept my kids out of it.
I used 4 shades of Procion dyes, however you can use as little as one. I was warned to try to keep it down, because the colors will start to get muddy as you go along.
I used the plastic container that the veggie platter comes in, from the grocery store. I love it when something is recyclable and I can use it one more time before I bin it. Like I got my money's worth.
I used Soda ash on the stove- it smells to high heaven! Keep a lid on it and crack a window.... even if it is December! This helps prepare your fabric for dying. I ordered several tote bags off of the internet. Amazon, Dick Blick, Micheals' and Joann's. It was fun to feel the different textures, they were all different sizes, some had pockets, other's didn't. I kept in mind the women in my life that I was making them for, so 2 went more emerald green, and one went way more purple and blue. The rest were rainbow, purple, blue, turquoise, and green.
grab a wet bag out of your Soda ash, wring it out, leave it scrunched up and dip it right in the dye, about 3 inches deep. Fold the skinny wet bag in half and dip the middle in another color.
Lay it flat in a tub. after they have been wet about an hour- throw it in the washing machine.
after they have been wet about an hour- throw it in the washing machine.
HANG Dry- not in the dryer.
Then I used, Sharpies, and Dacique Dyes painted on to make a few modificatons, You know, make it personal!
This project is probably 10 and up. I kept my kids out of it.
I used 4 shades of Procion dyes, however you can use as little as one. I was warned to try to keep it down, because the colors will start to get muddy as you go along.
I used the plastic container that the veggie platter comes in, from the grocery store. I love it when something is recyclable and I can use it one more time before I bin it. Like I got my money's worth.
I used Soda ash on the stove- it smells to high heaven! Keep a lid on it and crack a window.... even if it is December! This helps prepare your fabric for dying. I ordered several tote bags off of the internet. Amazon, Dick Blick, Micheals' and Joann's. It was fun to feel the different textures, they were all different sizes, some had pockets, other's didn't. I kept in mind the women in my life that I was making them for, so 2 went more emerald green, and one went way more purple and blue. The rest were rainbow, purple, blue, turquoise, and green.
grab a wet bag out of your Soda ash, wring it out, leave it scrunched up and dip it right in the dye, about 3 inches deep. Fold the skinny wet bag in half and dip the middle in another color.
Lay it flat in a tub. after they have been wet about an hour- throw it in the washing machine.
after they have been wet about an hour- throw it in the washing machine.
HANG Dry- not in the dryer.
Labels:
craft shows,
decorating,
Dip dye,
DIY,
easy gift,
ocean colors,
Procion Dye,
savings,
tote,
tutorial
Tuesday, January 5, 2016
Paper Journals
I've learned a lot about journal making, since I started this fun journey. over 300 Journals made.... just a few!!
Electrical tape is actually a form of binding- way stronger than washi tape. Makes the whole notebook more durable, and last longer going in and out of bags.
More Neutral colors, and some colored Duct tape bindings, the Metallic gold binding is really fun, makes it more of a design choice, less about demanding function.
I've been making more secure journals by using a contact paper seal- I can use delicate handmade papers, that are like tissue paper in consistency. The Modge Podge seal was making them wrinkle, and sometimes changing the colors. But, when I use contact paper-they are protected from water damage, and I feel secure about that!
There are so many awesome metal details that I now use. The name plates and the corner protectors are old school, and still useful. Age Before Beauty? even if it false age?? Distress inks help me give the illusion of age, but maintain the sturdy reliability of new materials.
Some of my journals for sale: Journals for sale!!!!!
Some of my older posts about making your own journals: composition notebooks tutorial.
Electrical tape is actually a form of binding- way stronger than washi tape. Makes the whole notebook more durable, and last longer going in and out of bags.
More Neutral colors, and some colored Duct tape bindings, the Metallic gold binding is really fun, makes it more of a design choice, less about demanding function.
I've been making more secure journals by using a contact paper seal- I can use delicate handmade papers, that are like tissue paper in consistency. The Modge Podge seal was making them wrinkle, and sometimes changing the colors. But, when I use contact paper-they are protected from water damage, and I feel secure about that!
There are so many awesome metal details that I now use. The name plates and the corner protectors are old school, and still useful. Age Before Beauty? even if it false age?? Distress inks help me give the illusion of age, but maintain the sturdy reliability of new materials.
Some of my journals for sale: Journals for sale!!!!!
Some of my older posts about making your own journals: composition notebooks tutorial.
Tuesday, December 29, 2015
Kids Art
My kids love to paint with watercolors, it's an awesome way to get them to sit still a minute and calm down. But, they make a ton of art, and I can't figure out what to do with it all, so I actually photograph it- write and e-mail to my son's e-mail address, and trash it. He has no idea he even has an e-mail address, I just thought I'd do that to keep track.
Some of their art projects are started by me- white crayon or I help them put down stickers to make "bubbles" under the paint. At 3 art projects a day... you just can't keep them all! So, over about 3 weeks,I started keeping the ones that were in similar colors. I used 16 paintings for this project, below is a sampling!
Next I used a 3 inch circle hole punch. They are kinda expensive, you can use any shape you like, and if you need to shop- use a 50% coupon at Micheal's Art Store.
Then I had to glue them in place. We put on a Tinkerbelle movie, that bought me about 10 minutes, then I was surrounded by helpers. One used circles for her feet, and the other one held my stack and handed me my circles! There was still glue on all of us, at the end of the day- Bath time All a round! {Honestly the baby had 2 baths, one was for the paint she used as make up.....fair warning}
The end result is a fun Piece of wall art for my living room! I like it- definitely scaly, kinda mermaid -ish! The kids are really proud and they point it out when family comes to visit.
Labels:
children,
decorating,
destruction,
kid art,
living room,
ocean colors,
watercolors
Sunday, July 26, 2015
Molten LAVA, I mean Lead
{Fair Warning- this is a really picture heavy post, it might take a second to get up and running, some things are better explained with pictures!!! }
My sister in law is a long time abstract artist and I have some small experience as a silver smith. So, when she found a video- https://www.youtube.com/watch?v=xwrAsNdODnE
We decided to try it.
Start off looking something like this-
Then try to figure out what you are going to use to melt off your lead... Let's see the stove they used in video, I did order, however it runs on a tank of Butane-not Propane, which is what I actually have at home. SO~ off to the store we go, again.
That's my little butane torch and one of my little propane tanks and I have a big propane tank in the background there somewhere. No matter- wrong attachments and wrong fuel source, gets you no where fast. The little Butane I use to solder sterling worked, but it didn't sustain the heat for melting more than a few square inches at a time. So we did accomplish melting- just not consistent liquid.
Now, I'm finally all set up- check out the really cute shop shoes there! Yikes!!! Safety over Fashion girls, all the time!!!
This is the first go around, starting to melt it off and making a neat pattern- I actually thought this was a video, but I guess not!!!
More melting!!!
And a beautiful shiny surface~
Here is a video of the Coca Cola hitting the molten surface of the lead. This is the second patty that we made.
Fully Quenched! That's about it for the fun fire parts! One to scrub and rinse and polish and paint.....
Maybe you should check back in later and see the final results!
Friday, March 13, 2015
Destructive Creativity- postage stamps
Right now, I'm exploring the idea of taking old postage stamps, and making some reclaimed jewelry from them. It's been on my mind a long time. These famous masterpieces, and sometimes, just commissioned images, waiting to be made into small ideal jewelry designs.
Once they have been cut up, there's no more stamp. That's now gone. Hopefully no stamp collector's have a heart attack. A new thing is in it's place, sometimes imperfect, and sometimes, a wearable piece of art.
Destruction for the case of new beautiful thing. Sometimes, it's worth it!
Once they have been cut up, there's no more stamp. That's now gone. Hopefully no stamp collector's have a heart attack. A new thing is in it's place, sometimes imperfect, and sometimes, a wearable piece of art.
Destruction for the case of new beautiful thing. Sometimes, it's worth it!
Saturday, March 7, 2015
Journal your Love notes
I'm a pretty disorganized person, now that I have small children. They move things, and I take it from them, and I put it in a place that is "safe", and they can't reach... so the tops of my bookcases are just crammed with random things.
One precious thing that I haven't lost, is a notebook of love letters. I started writing it to my husband before we were married. It's a precious little notebook, that I have written back and forth to him for 13 years. I used to write on a whim on a random Tuesday, but now I write around our anniversary, and on major holidays.
Since I love paper products so much, I do make him sweet little cards that are basic and say I love you. The heart felt love letters though, those all go in the journal. All in one location- and harder to lose and organize than a shoe box of cards.
If I'm blue, or overwhelmed; tired and discouraged... these love letters are there for me, even if the hubby is at work!
![]() |
| This is the cover of my actual Love Letter Journal. |
One precious thing that I haven't lost, is a notebook of love letters. I started writing it to my husband before we were married. It's a precious little notebook, that I have written back and forth to him for 13 years. I used to write on a whim on a random Tuesday, but now I write around our anniversary, and on major holidays.
Since I love paper products so much, I do make him sweet little cards that are basic and say I love you. The heart felt love letters though, those all go in the journal. All in one location- and harder to lose and organize than a shoe box of cards.
If I'm blue, or overwhelmed; tired and discouraged... these love letters are there for me, even if the hubby is at work!
Friday, February 20, 2015
Creating a Table of Contents
I am a note-taker and a list writer, and sometimes I use the same notebook for everything. As a kid, I used a different notebook for every subject. I struggle to keep up with three different notebooks in addition to my planner. I even tried to keep separate memos on my phone for everything. My brain likes to see me writing things down. I'm not really sure why!
How do you keep everything separated? Well, there is a cool trick that students learn in Japan. They make a table of contents on the last page of a notebook. It's a way to conserve paper and resources, since every notebook gets used 100%.
You write as you need to through out your journal. No, skipping around, looking for lost notes. Then mark the page for each topic used, and use the reference in the back of the notebook.
I've left some really boring pictures to give you a general idea.
How do you keep everything separated? Well, there is a cool trick that students learn in Japan. They make a table of contents on the last page of a notebook. It's a way to conserve paper and resources, since every notebook gets used 100%.
You write as you need to through out your journal. No, skipping around, looking for lost notes. Then mark the page for each topic used, and use the reference in the back of the notebook.
I've left some really boring pictures to give you a general idea.
![]() |
| This is what the pages of my notebook now look like. |
![]() |
| This is what my last page of my journal looks like. |
Monday, February 9, 2015
Showing the Process- Copper Pipe Pendants part 2
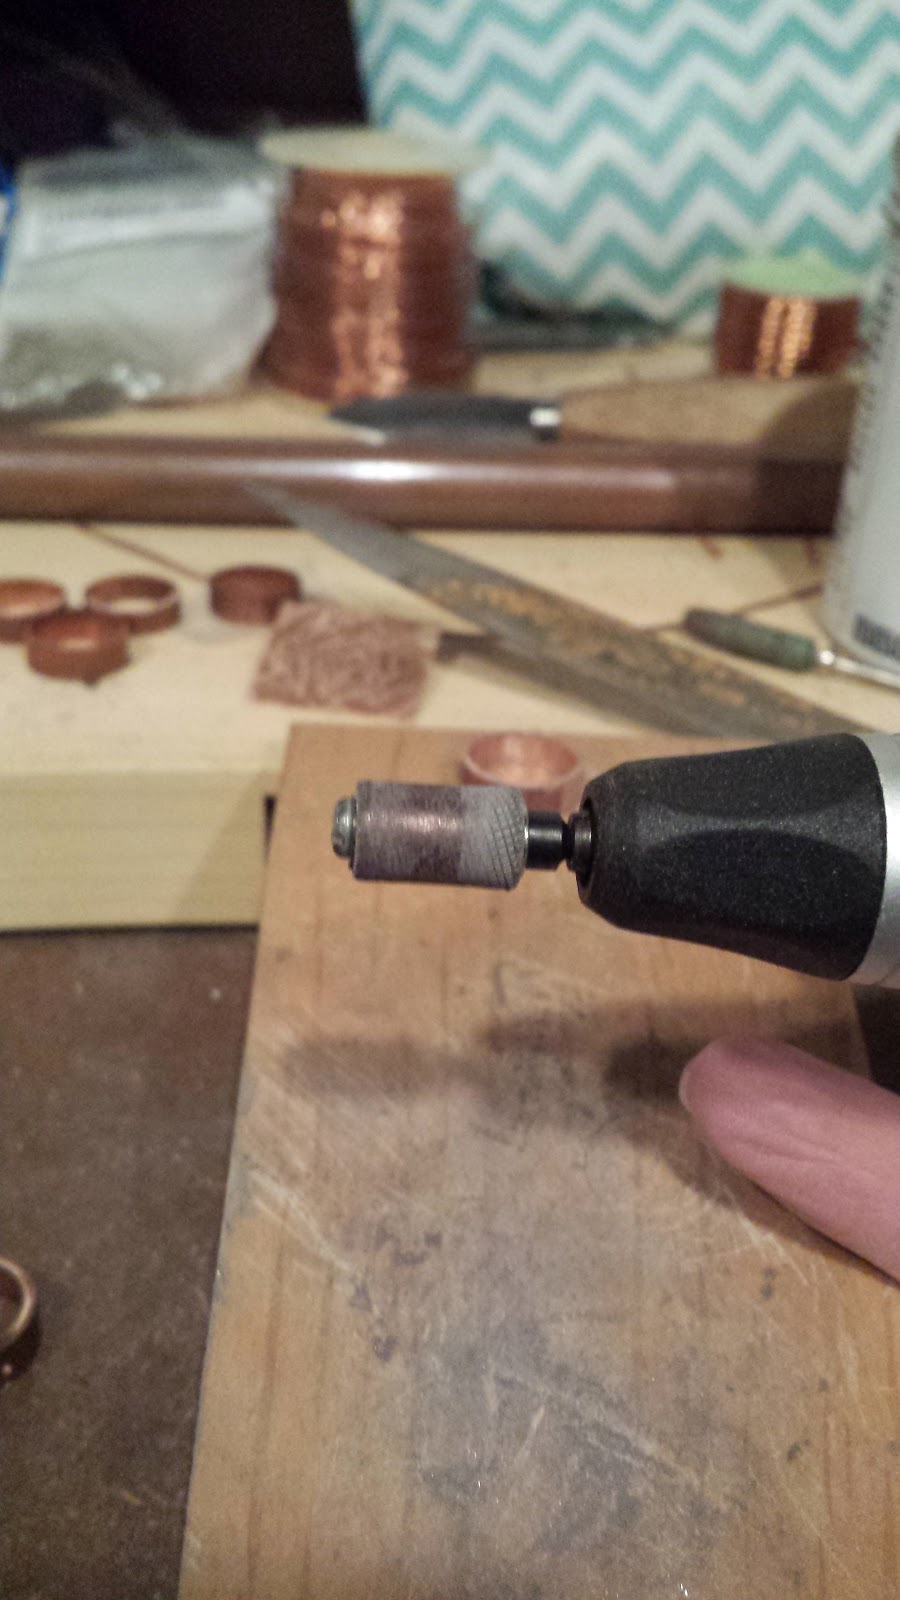
In part 1- I showed how to cut a copper pipe into smaller pieces to make copper pendants. It's not really a tutorial per se, more of some pictures of what I do. I skipped some really boring steps, like measuring and using a sharpie marker for the etching.
Once I have the circles cut, there are a few things that need to happen, cleaning, and etching. That's many pictures of filing and a couple pictures of my pickle pot, Wire-wrap a bail, it's hard to photograph, when both hands have pliers in them! More boring stuff! Then I squish a piece of polymer clay inside:
Then you follow your resin instructions, and carefully pour. I use a medicine dropper for babies, since I have babies and seem to have a bundle of those- after each use they get thrown out, the resin residue is sticky and super hard to clean. So, I toss them out.
Once I have the circles cut, there are a few things that need to happen, cleaning, and etching. That's many pictures of filing and a couple pictures of my pickle pot, Wire-wrap a bail, it's hard to photograph, when both hands have pliers in them! More boring stuff! Then I squish a piece of polymer clay inside:
My clay is dirty and swirly. I wasn't careful to keep it fresh, since it will be covered anyway. However, if your polymer is a bright color, say sky blue? Yeah, it might show through your art work! So, careful about that.... since it sort of shows on my horse pendant!
I made a mold of my copper pipe and I used that as a template to cut out my postage stamp art.
Then you follow your resin instructions, and carefully pour. I use a medicine dropper for babies, since I have babies and seem to have a bundle of those- after each use they get thrown out, the resin residue is sticky and super hard to clean. So, I toss them out.
Even with practice- things can go wrong. Two of these pendants didn't harden, and the tape on my clear backless pendant, gave way and made a big mess. The big mess- well, out of luck there. But, the ones that didn't harden? I waited a week- a really long time, usually hardening occurs in 2 days, but I wanted to be super sure the pour went all wrong. It was wrong, so I poured again, and, Voila! hardened perfectly.
These pendants take a lot of time. Making a batch, I cut 12 bezels, and ended up making 5 pendants, 1 pendant is irreparable, and the time investment is still around 9 hours. I'm hoping to get faster with each round, it still seems like quite a bit of time "hands on" then there is a bit of time- left in the etching acid, in the pickle pot and drying resin- those stages are "hands off" but I still set the oven timer, to be sure things don't get over done.
I hope that you can see how this comes together and get inspired for your own next project.
Monday, February 2, 2015
Make your own Banner
Craft Show Preparations
4 days ago
Well, you could call it Craft Show preparations- or you could call it- the week of Panic!
My old show banner is damask paper sewn into a banner. And it is very cute- and also fragile!
So a new show sign was in order- Wow, what a lot of work, next time it might be worth it to purchase a fancy vinyl job.
I painted a 15 inch by 60 inch canvas. I'm weird so I actually had that size on hand from a canvas sale over 5 years ago. I looked at some of my favorite artists for inspiration, and one day while both kids slept- I jumped in and only had 20 minutes to get work done.
So over a weekend I worked on the colors and over washes. I took a cotton ball and dripped turpentine and burnt umber over the other oil paints. This made a cool effect.
Then I had to choose a font. So, I played around on www.dafont.com. I was pretty successful after a few hours and I settled on Sauerkraut.
My printer died- or rather stopped recognizing my ink cartridge, mean old thing. Had to rush out and buy a printer, and print off the letters- sized 800. Then used an Xacto knife to cut those babies out.
I used a water color pencil to outline a few letters and I filled in the flatter outside pieces when I could.
Then I filled those letters in with Sharpie. Of course I got mad, when in day light I could see the lines of the coloring. Argh! So I painted in with Payne's gray oil paint- thinned out a bit. This helped me get an all over coverage that really helped. Thinning it- that helped it dry in about a 24 hour period.
Last I used a cool powder additive that left a beautiful purple sheen highlight over the letters. In this picture, you will notice that effect especially on the J and O.
Saturday, January 31, 2015
That Ridiculous Blue Pendant
Actually it's really nice, now that it's finally finished- see?
I tried to work out a few different sized filigree pieces for the rounded back. Since it's not a flat back, that was actually a challenge to round over perfectly. A few banged up pieces later, it looks pretty good. Lesson learned- take the stone out, and bang that metal into submission! (carefully and gently, so you don't mar the pattern.)
Then a manufactured bail was too awkward, and the wrong color. A wirewrap job was nice and tight, but small and insignificant against such a dramatic crystal. So, I put it away, away for another day. It was in my "for sale" box. But, I didn't put it out on my table for sale, and I didn't list it online. See, I was sort of embarrassed by it's awkwardness.
Today, I realized that my shop on Etsy is getting pretty thin, what do I have made already to beef up the inventory? Well, this thing is floating around, but I'm NOT proud of it. Why is that?
So I pulled out some filigree, and tried to add it, and cut it up, and add some more, and cut that off and trim it down..... you know what! I finally like it! I hope the darn thing sells!
![]() |
| Available here! |
I tried to work out a few different sized filigree pieces for the rounded back. Since it's not a flat back, that was actually a challenge to round over perfectly. A few banged up pieces later, it looks pretty good. Lesson learned- take the stone out, and bang that metal into submission! (carefully and gently, so you don't mar the pattern.)
Then a manufactured bail was too awkward, and the wrong color. A wirewrap job was nice and tight, but small and insignificant against such a dramatic crystal. So, I put it away, away for another day. It was in my "for sale" box. But, I didn't put it out on my table for sale, and I didn't list it online. See, I was sort of embarrassed by it's awkwardness.
Today, I realized that my shop on Etsy is getting pretty thin, what do I have made already to beef up the inventory? Well, this thing is floating around, but I'm NOT proud of it. Why is that?
So I pulled out some filigree, and tried to add it, and cut it up, and add some more, and cut that off and trim it down..... you know what! I finally like it! I hope the darn thing sells!
Tuesday, January 27, 2015
Showing the Process-Copper Pipe Pendants- Part 1
It was recommended that I make something to show how much work it takes to make my little pendants. This isn't really a tutorial- just kind of show and tell, in action in the shop
![]() |
| Cutting pipe- about 30 turns goes through the copper pipe. |
![]() |
| Some etching went right, but it needs to show up more. |
![]() |
| Lined up, like ducks in a row! |
![]() |
| Polishing with the Foredom. |
![]() |
| 20 gauge wires, cut about 3 inches. |
![]() |
| This is my butane torch. Not my favorite, I prefer the oxygen, but it needs new lines. |
![]() |
| Making headpins. |
![]() |
| Painted with fire. |
![]() |
| Punching the hole for the bail. takes loads of hand strength. |
Subscribe to:
Posts (Atom)